How to Change a Photo's Background
Published: November 10, 2026
Source: Free background-remover apps (in-app tools)
Replace a messy photo background with a clean one using free mobile editors.
Before you start
- Pick a sharp, well-lit photo with a plain background behind the subject before you start — a blurry photo gives blurry edges no matter how good the app is, and busy backgrounds are much harder to cut out.
- Check whether the free version of the app lets you save the result without a watermark before you spend time editing — if it asks you to pay or sign up before you can even try the tool, close it and try a different one.
- Decide what the photo is for first — a plain white background works best for ID and profile photos.
Pick a background remover app
Look for a free photo editor that has a "Remove background" or "Cutout" tool — many popular editors have one, and there are also free websites that do the same thing in your browser. Pick one with good ratings and recent reviews, and check whether the free version lets you save the result without a watermark before you spend time editing.
Open the app and look for the background tool on the home screen or in the edit menu — it is often called "Remove BG", "Background", or "Cutout". If the app asks you to pay or sign up before you can even try the tool, close it and try a different one. A good free tool lets you test it on one photo first, so you can see the result before you commit.
Upload your photo
Tap "Upload", "Open photo", or the "+" button and pick the photo from your gallery. The app will upload it and, in most cases, cut out the person or object automatically within a few seconds. You will see your subject on a plain or chequered background — the chequered pattern means the background is now transparent, not white.
Wait for the tool to finish before you tap anything else. If the photo is very large or your internet is slow, it can take a little longer. If the automatic cut missed a big part of the subject, or cut away an arm or a leg, do not worry — you will fix that in the next step. If the whole result looks wrong, try a different photo or a different app.
Fix the edges
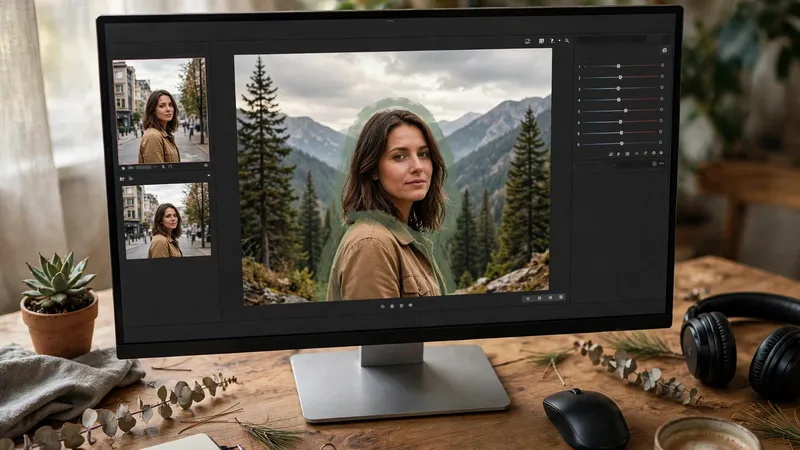
Zoom in on the edges of your subject, especially around hair, glasses, ears, and fingers — that is where automatic tools make the most mistakes. Most apps have two small brushes for this: "Restore" paints back parts of the subject that were cut away by mistake, and "Erase" removes leftover bits of the old background. Use a small brush size and go slowly around the tricky parts.
Check your work against both a dark and a light background if the app lets you switch the preview — a leftover white edge shows up on a dark background, and a dark edge shows up on a light one. When the outline looks clean and smooth at full zoom, you are done. Do not rush this step: rough edges are the one thing that makes an edited photo look fake.
Add the new background and save
Now choose what goes behind your subject. Most apps offer a solid colour, a gradient, a blur of the original photo, or a new image from your gallery. For an ID or profile photo, a plain white or light colour usually looks best. Tap the colour or image you want, then drag and pinch your subject to move it and change its size until it sits nicely in the frame.
When you are happy, tap "Save" or "Export". Choose the highest quality the free version allows, and save as PNG if you want to keep the background transparent for later use — JPG does not keep transparency and will fill the empty area with a colour instead. Check the saved photo in your gallery before you share it. If you need this photo inside a form or document, you can turn it into a PDF on your phone afterwards.
Tips
- A plain white background works best for ID and profile photos.
- Start with a sharp, well-lit photo — a blurry photo gives blurry edges no matter how good the app is.
- Photos with a plain background behind the subject are much easier to cut out than busy ones, so pick your best shot before you start.
Keep in mind
- Free apps may add a watermark — check the export before paying or sharing.
- Some free tools save at lower quality unless you pay — check the saved photo at full size before you use it for anything official.
- Do not upload someone else's photo or a photo with private details to a random website — use a trusted app, and delete the upload if the site offers that option.
- Do not use a background-changed photo to mislead anyone — for example, do not edit yourself into a place you were never at for an official document.
FAQs
Which size for a passport photo?
Most portals ask for a passport-size photo with a plain white background. The exact size and file rules are different for each portal, so check the portal's own photo rules before you upload. If you are applying for a passport, see our guide on how to apply for a passport online for the full list of documents you will need.
Why does the hair look bad after removing the background?
Hair is the hardest part for any automatic tool, because thin strands mix with the background. Zoom in and use the "Restore" brush to paint back the strands that were cut away, and use a small brush size. If the photo is low quality or the background behind the hair is busy, even careful brushing may not fix it — try a different photo with a plainer background.
Should I save as PNG or JPG?
Save as PNG if you want to keep the background transparent, so you can place the cut-out on a different background later. Save as JPG if you have already added a new background and just want a normal photo — JPG files are smaller and open everywhere, but they cannot keep transparency.
What if the app will not save without a watermark?
Some free apps put their logo on the saved photo unless you pay. Check the saved result before you share it — if there is a watermark, try a different free app or website, or crop the photo if the watermark sits at an edge you can cut off without losing the subject.